Migrating from on premise TFS to Visual Studio Team Services
Introduction
Our on-premise version of TFS 2013 was starting to get a little dated, and we wanted to upgrade to the latest and greatest version. Initially we looked at upgrading to TFS 2015 – however we decided that, to avoid needing to go through the upgrade process again, VSTS would be a better solution.
As of writing (we’ve been expanding rapidly) we have four Global teams (as in our Global Project, rather than overseas) and three UK-focused development teams all working to the scrum agile development methodology. All required migration from our on-premise solution to the cloud. Roughly around 70 users of TFS in total (developers, product owners, project managers, etc.) needed migrating.
I would say the most important step taken during the whole process was the means of communicating with everyone using the system, so that everyone is clear on what is happening. Part of this was also communicating well with the team leads so their teams were aware of the changes and so that I wasn’t a bottleneck for any problems that were to occur.
This blog post will cover at a high level what work is involved and our experience. Future blog posts will delve deeper in to the how and why. Please leave a comment below for anything you want to learn more about and I can write about those in future posts.
Setup
Our solution consists of using VSTS in the cloud for work item management and source control storage. We have an on-premise build server (TFS 2015) for our builds due to the complex nature around some of our BI builds, that then integrates with our on-premise Octopus Deploy server. We have also connected VSTS to our Azure AD so that we can sign in with our work accounts rather than individual Microsoft accounts. By having this linked also aided in mapping users from old to new when using the work item migration tool that will be covered later.
Creating an instance of VSTS
Creating a new instance is simple and easy (requires no credit card or immediate association to an Azure AD). Just go to www.visualstudio.com and create an account with your existing Microsoft account. It’s free to use for small teams, and you get 5 basic licences to use straight away. In our case, as we have more than 5 users, we use our MSDN licensing that provides free access to use VSTS. If you have Product Owners or others who need to make backlog changes you will need to look at purchasing Basic Licences. It’s free to add Stakeholders who can just get a read-only (work item only) view of the world.
Setup a team project, teams, areas and iterations
I simply mirrored the existing structure we had on-premise so there was nothing particularly difficult here if you understand how your existing setup works. The only differences you will see are the UX improvements Microsoft have provided (i.e. the way areas are configured) – however it is otherwise straight forward. We use the following structure:
- DefaultCollection (Team Project Collection)
- Development (Team Project)
- Team A (Team with Area)
- Project A (Area)
- Team B (Team with Area)
- Project B (Area)
- Project C (Area)
- Team A (Team with Area)
- Global (Team Project)
- Team D (Team with Area)
- Project D (Area)
- Team E (Team with Area)
- Project E (Area)
- Team F (Team with Area)
- Project F (Area)
- Team D (Team with Area)
- Development (Team Project)
Each team has their own backlog that may have different work items for many different projects. The good thing about this is that it clearly shows the priority of the backlog, regardless of project. Therefore if you are working on two different projects with two product owners then the product owners must discuss between themselves what story is most important. You may have a different setup based on your needs, but if you are using multiple team project collections I highly recommend you read this blog post. It’s a few years old now, but it’s still relevant and even Microsoft reference it from MSDN.
Connecting to Azure AD
Connecting to Azure is beyond this blog post, but Microsoft provides a fantastic article full of screenshots that take you through step-by-step here. We have an Office 365 subscription so we could just take advantage of existing users in Azure AD – however if you don’t currently have an Azure AD, and want to log in as the users in your on-premise AD, then you’ll need to create a new Azure AD and set up a sync.
Hybrid Build
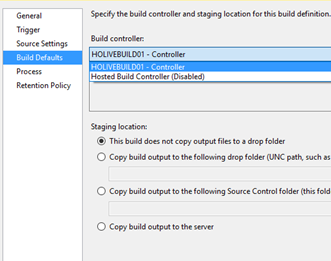
As mentioned there are some complex BI builds we need to run on-premise thus our happy path to VSTS was to keep builds on-premise for the meantime and set up a hybrid build solution. There’s a fantastic blog post by Anthony Borton that runs through the steps required to install TFS on premise and link this to Visual Studio Team Services (referred to as the old name of Visual Studio Online in the post). It’s as simple as installing TFS and configuring the build service to connect to VSTS. The build controller can then be selected from your build definition.
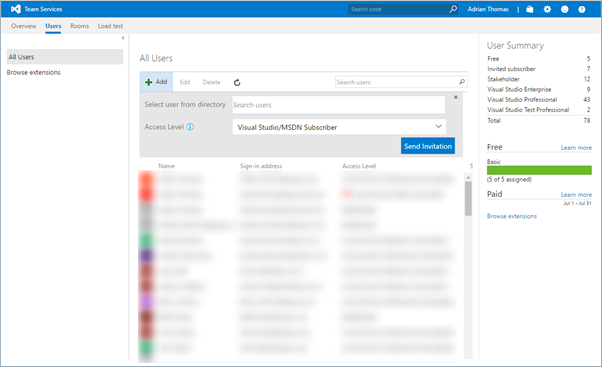
Adding users and licensing
Adding users is unfortunately a bit of a manual step. If you have linked to your Azure AD, you still need to add the users you want to use VSTS in, as well as associate them with a licensing option of:
- Basic
- You get five for free by default. This gives full access to work items, source code, etc.
- Stakeholder
- Read-only view to work items only
- Visual Studio/MSDN Subscriber
- Same as basic but just allows you to take advantage of an existing subscription without having to pay for more basic licences.
To associate a VSTS account with MSDN, you can follow the short article here. Each of your Visual Studio/MSDN subscribers will need to do this for their accounts.
Migration
The easiest path to migration is probably not migrating anything if you can get away with that. However, most of us probably can’t.
In our scenario we needed to migrate the backlog, source code, build definitions and test cases. One tool to help us do this is the OpsHub Visual Studio Migration Utility – for our newer Global Team Project we could use this for both backlog and source code migration without too many hiccups. Unfortunately, we couldn’t use it for our UK Team Project as we had many customisations that weren't compatible with the tool. We couldn’t use it for source code either as the tool replays changesets and had some failures due to path lengths. I won’t go through using the OpsHub tool as it’s fairly self-explanatory, but I will delve deeper in to some of the methods used for our UK Team Project migration.
Backlog
Besides the above option, you can either use Excel with the ‘Team’ plugin, or you can simply add each item manually.
As my team had a couple of hundred backlog items, it was easier to do this with Excel. The difficulty however is again due to the customisations (i.e. our PBI state was ‘To Do’, ‘In Progress’ and ‘Done’ rather than ‘New’, ‘Approved’, ‘Committed’ and ‘Done’), but using conditions in excel and a bit of copy and pasting it proved easy to remove the customisations.
One nuance I found was that if you have a conflict during publishing, you can mess up the order of the backlog. Therefore, if you want to preserve the order of the backlog it’s important that you know the publish will be successful (this will likely be through trial and error).
Once the backlog had been migrated, it’s important to mark the source TFS as read only so that nobody continues to use the old instance. We wanted to keep the old instance running for a period so that it was available for reference in case there were any issues.
Source Code
If you’re wanting to preserve history, you may be out of luck. The OpsHub tool can help with this but if you’ve had a repository for a while the chances are the tool will fail for one reason or another. Realistically we didn’t require history – and if we did, it was only in the short term, which we could look at our old TFS instance for. For our newer Global Team Project the OpsHub tool worked without a hitch, but it just wasn’t possible for our UK Team Project. So we went down the route of one large check-in; essentially downloading all the source code to disk, then copy and pasting in to the VSTS repository and checking in. It’s important you check that Visual Studio hasn’t excluded any files, because it will try to exclude *.exe and some other file types by default.
Build Definition
Generally, there are a couple of options available, neither perfect. There is the Community TFS XAML Build Manager for VS2015 that allows you to export from on premise and import to VSTS. The issue we had was that the exported JSON was required to be manually edited to use the new build controller, and correct build template.
Another option is to manually create a single new XAML build definition that works in VSTS, then clone this using the TFS 2015 Power Tools. The benefit of this is that most settings in the build definition will already be correct, but again it requires some manual adjustment with regards to build name, source location, etc.
We’ve just generated our build definitions as and when required. If we needed to perform some work on a particular project then we just did the work at that stage, rather than doing it all upfront for projects that may not get worked on for a while.
Test Cases
Test plans/suites/cases turned out to be particularly difficult to migrate. We couldn’t find any tooling that would be able to do this for us. It’s possible to manage tests using the TFS SDK on-premise, and there is a restful API for VSTS, so a custom solution could be produced where time is permitting.
Unfortunately, Excel was out of the question, as test plans and suites cannot be queried as usual and test cases when published were not possible to be linked to a test suite or plan.
Thus the remaining option was to create test plans/suites manually (thankfully not large numbers) and then copy and paste them across using the grid view (though this is only available for Enterprise subscribers). You can find more details on that process here.
Summary
So, there you have it. Regrettably, there’s too much to cover in a single blog post, but keep tuned for future posts where I'll be going in much deeper!